While creating and collecting documents, images or any other data, there is the need to store these data in the cloud for backup reasons. There are many storage providers out there like Google Drive or Dropbox which support integration into the operating systems file explorer like Finder on Mac or Windows Explorer on Windows. This is very comfortable. But one should keep in mind, that the data are not protect from being read by the company or by intelligence services.
Furthermore there are other services like Backblaze or AWS S3 Glacier. Basically, there is the same issue with the privacy of our data.
The solution is to either use a service like Spider Oak One Backup or if it is necessary to keep the hand over the whole process a service or software, that runs on your local machine and encrypts your data. Here comes Cryptomator into the ring.
Cryptomator offers the possibility to encrypt the data locally on the client - your computer. Therefor, Cryptomator will create local vaults protected by a password (I will write about secure passwords in one of the next pots). After the vault is being created it has to be opened by providing the vaults password. A local drive will be created and mounted. You can think of a external hard drive or an external computer or server. Now you can put files, documents, videos and everything else into this drive. If done, you simply close the vault in the Cryptomator software.
Now comes the good part. The data in the vault are encrypted using the Advanced Encryption Standard - AES. That means, without knowing the password for the vault, it is nearly impossible to decrypt the data. Furthermore Cryptomator also uses scrypt to prevent brutforce attacks. If you want to dive deeper into the security and encryption concepts take a look into the Security Architecture Documentation.
As Cryptomator is open source, everything about the software is openly accessible. This is a sign, that you can trust the software and that there will be (with a very high chance) no backdoors or other possibilities for intruders.
Step by step creation of a Cryptomator vault
1. First of all, you need to download and install Cryptomator from https://cryptomator.org/ downloads. When done, install the software by following the installation instructions.
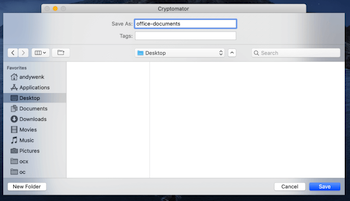
2. After starting the software simply create the first vault by giving a name and a store place for the vault.
3. Set a strong password for the vault.
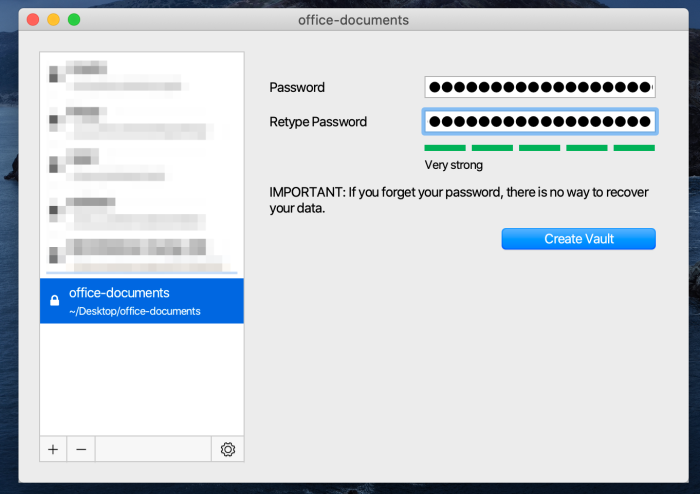
4. Then open the vault by providing the password.

5. Cryptomator will mount a drive where you now can put in your data.

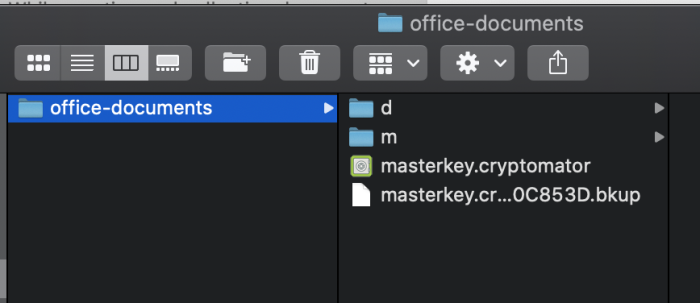
After you have done your work, simply close the vault in the Cryptomator software. What is left, is a structure of completely encrypted data. It looks like this:
Storing the Cryptomator vault in the cloud
Now that the data are encrypted, the last step is to upload the data to the service of your choice. Because the data are completely encrypted, you can use any service you like - even Dropbox. I propose you choose the most inexpensive service you can find. I personally use Backblaze B2 Cloud Storage and am very satisfied with it.
Conclusion
Keeping your data safe and protected from unwanted authorities, companies or other people is simpler as many people think. You should not trust big companies like Google, Dropbox or AWS. The post showed a simple and not too uncomfortable way to protect your data.
How are you protecting your data? Which software or services are you using and which experiences can you share? I am grateful for a comment in the comments section below.
Disclaimer
I have no relationship or connection to Cryptomator or Skymatic GmbH. I simply use the software because it is very good.
The Cryptomator logo is licensed under CC BY-SA 4.0 and the author is Katharina Hagemann. The font used is Dosis (Bold) under the Open Font License.
I posted this article originally at Publish0x